
BeagleBone 101
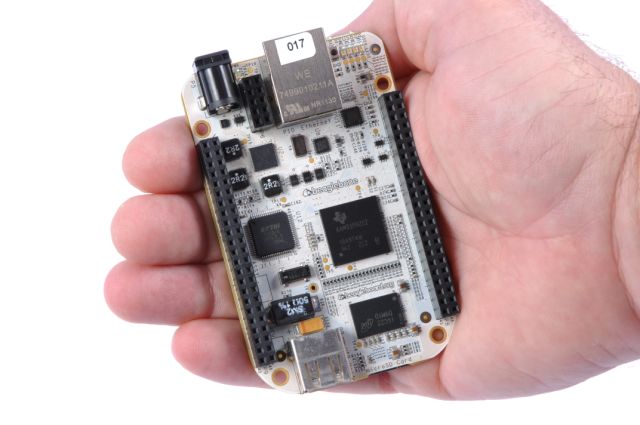
BeagleBone: open-hardware expandable computer
Artist-tested, engineer approved
The left-hand navigation bar will help you explore your board and learn how to program it.

Latest ARM open source focused on easy hardware experimentation
- Ships ready to use
- Angstrom Distribution with C++, Perl, Python, ...
- Linux drivers support countless USB peripherals
- Interactive tutorial to start learning about capabilities
- Open source means options
- Texas Instruments releases: Android, Linux, StarterWare (no OS)
- Linux: Angstrom Distribution, Ubuntu, Debian, ArchLinux, Sabayon, Buildroot, Erlang, Fedora
- Other: QNX, FreeBSD
- Projects page
- SD card images like get-out-of-jail-free card
xzcat XXX.img.xz | sudo dd of=/dev/sdX
- Can be used just as easily for backups
- Board can be booted from SD using device ROM, so you can't "brick" it
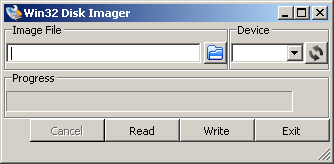
- 7-zip and Ubuntu Win32DiskImager enable programming cards from Windows
Update board with latest software
There are multiple ways to run initial software on your board, but it is likley that the simplest way to get an update is to create an exact replica of a bootable microSD card and boot off of it. The BeagleBone Black Rev C has 4GB of eMMC storage that can be initialized by a program booted off of a microSD card. If you want to update to the latest software image for your board, this is a way to do that.
See updates for the step-by-step guide.
Information about getting the source code for the image shipped with your board can be found at beagleboard.org/source, along with instructions for rebuilding it.
BoneScript interactive guide
BoneScript is a JavaScript library to simplify learning how to perform physical computing tasks using your embedded Linux. This web page is able to interact with your board to provide an interactive tutorial.
Example
var b = require('bonescript');
b.pinMode('USR0', b.OUTPUT);
b.pinMode('USR1', b.OUTPUT);
b.pinMode('USR2', b.OUTPUT);
b.pinMode('USR3', b.OUTPUT);
b.digitalWrite('USR0', b.HIGH);
b.digitalWrite('USR1', b.HIGH);
b.digitalWrite('USR2', b.HIGH);
b.digitalWrite('USR3', b.HIGH);
setTimeout(restore, 2000);
Running the above example will cause all of your LEDs to light up at once for a couple of seconds.
To learn more about Bonescript, please continue exploring this interactive guide.
Cloud9 IDE
To begin editing programs that live on your board, you can use the Cloud9 IDE.
If your board is plugged into your USB port, click on the "Cloud9 IDE" link above to start the editor.
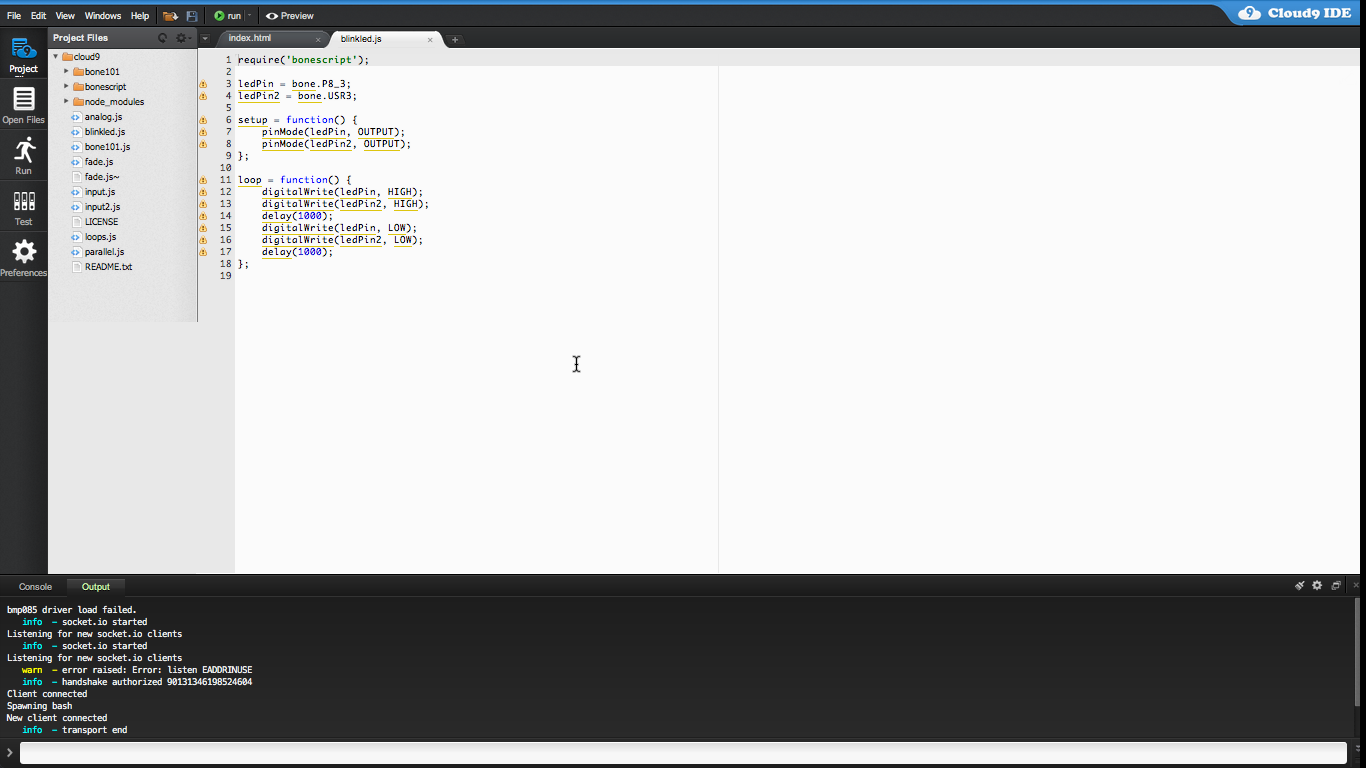
As a simple exercise to become familiar with Cloud9 IDE and the Bonescript JavaScript library, creating a simple application to blink one of the 4 user programmable LEDs on the BeagleBone is a good start.
- Step A: Close any open file tabs.
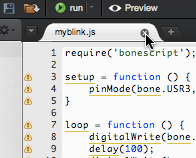
- Step B: Click the "+" in the top-right to create a new file.
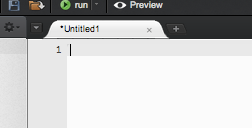
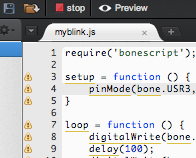
- Step C: Cut and paste the following code into the new tab:
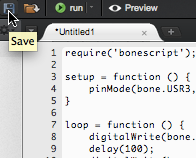
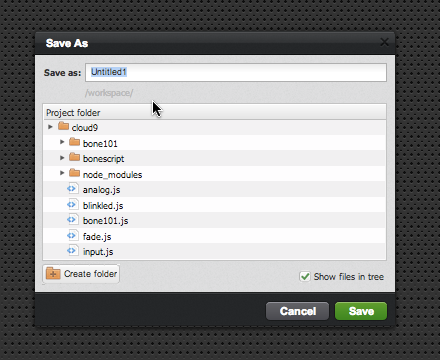
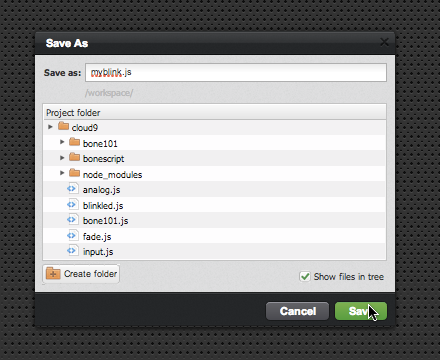
var b = require('bonescript'); var state = b.LOW; b.pinMode("USR0", b.OUTPUT); b.pinMode("USR1", b.OUTPUT); b.pinMode("USR2", b.OUTPUT); b.pinMode("USR3", b.OUTPUT); setInterval(toggle, 1000); function toggle() { if(state == b.LOW) state = b.HIGH; else state = b.LOW; b.digitalWrite("USR3", state); } - Step D: Save the file by clicking the disk icon and giving the file a name with the .js extension.
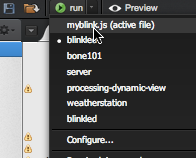
- Step E: Run the code by selecting the arrow to the right of "run" (or "debug") in the toolbar to pull down the list of files to run and select your new file.
- Step F: Observe the BeagleBone USR3 LED blinking steadily about 5 times a second.
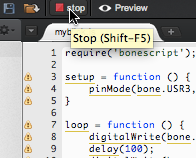
- Step G: Stop the code by clicking "stop" in the toolbar.
Additional information about the Bonescript library is available in the presentation viewed in the next step and on-line at http://beagleboard.org/project/bonescript.
Autorun
Once you've finished developing your JavaScript application, you can have it start upon boot-up by simply dropping it into the 'autorun' subfolder (located at /var/lib/cloud9/autorun in the file system).
The systemd bonescript-autorun.service runs at start-up and uses the /usr/lib/node_modules/bonescript/autorun.js script to automatically detect when .js files are in this directory and invoke them as separate processes with node.js. When the files are changed or moved, the script will kill the processes.
Resources
To learn more about Cloud9 IDE and to synchronize the software on your board with cloud-hosted services, see www.c9.io.
For more information on Node.JS, the JavaScript interpreter, see www.nodejs.org. Note that version 0.10.25 is what is currently installed on the default image and you can find the api documentation at www.nodejs.org/docs/v0.10.25/api.
For more information about the Bonescript library, see www.beagleboard.org/bonescript.
List of common Linux commands
|
|
Other programming environments
The board also ships with gcc, python and more that can be invoked directly from the command-line.
Hardware documentation
The BeagleBoneBlack wiki page documents all of the known hardware issues, as well as the latest available software, hardware documentation and design materials.
Always read the System Reference Manual!!!
Design materials
Design materials for creating your own customized version of the hardware or for better understanding the design are also linked from the traditional home of "http://beagleboard.org/hardware/design"
BeagleBone Black hardware details
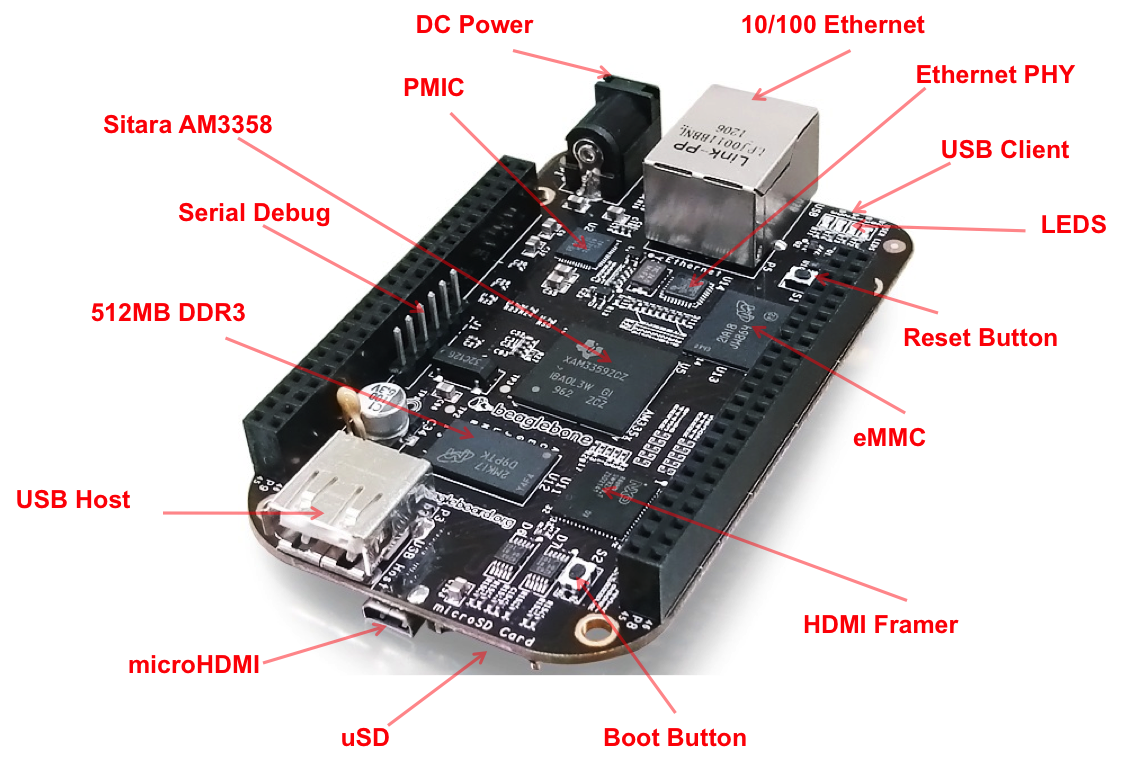
Revision A5 also provides a POWER button that can be used to enter and exit hibernate modes once that feature is implemented in the software.
Headers
The expansion headers provide extensive I/O capabitilities.
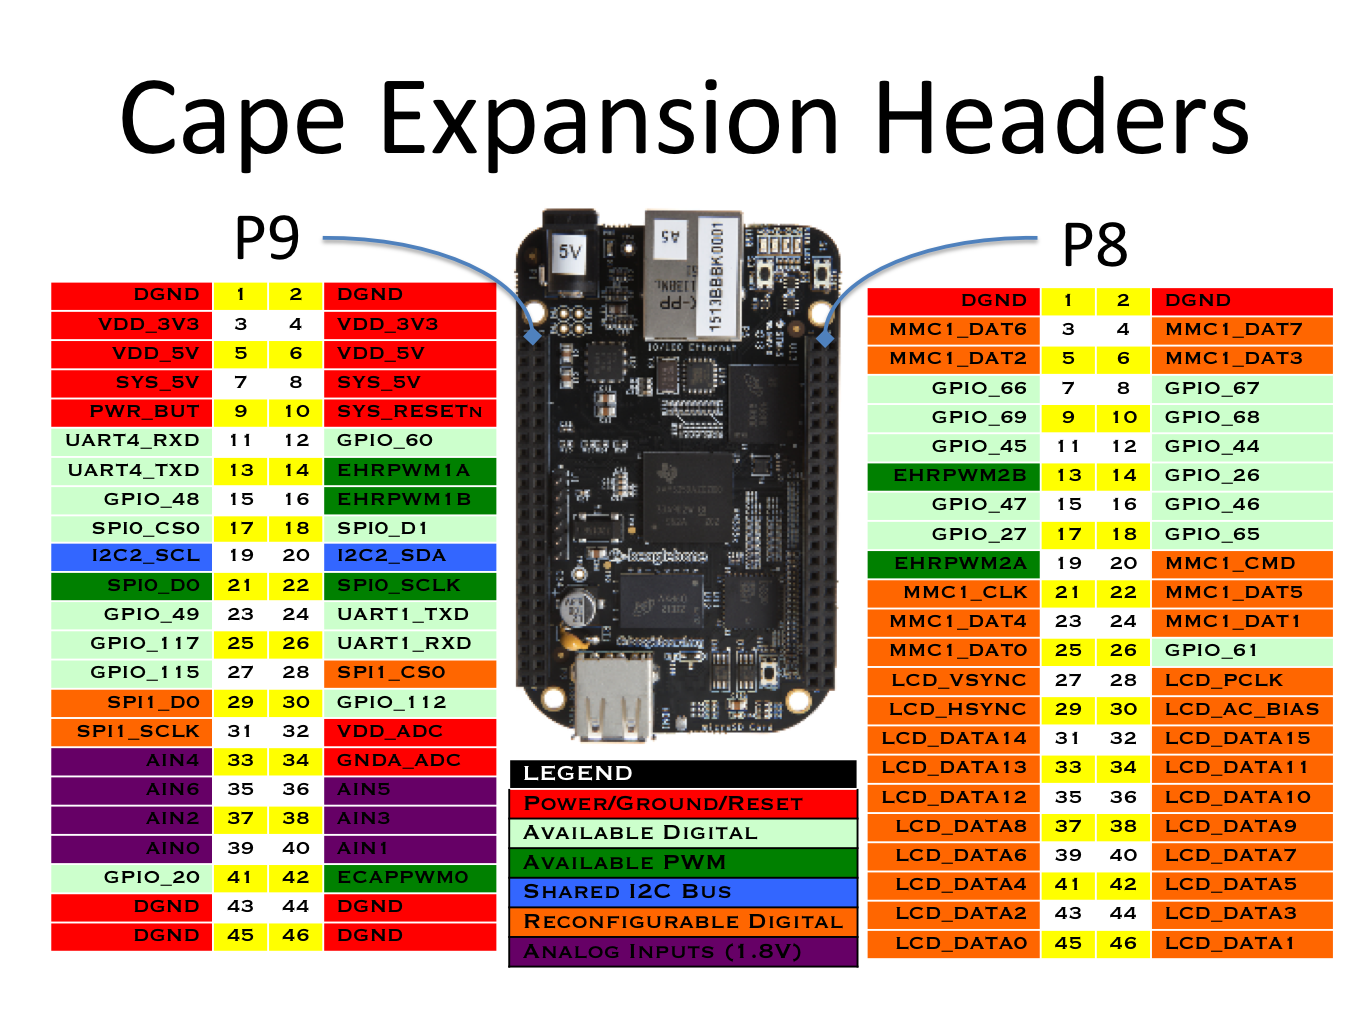
Each digital I/O pin has 8 different modes that can be selected, including GPIO.
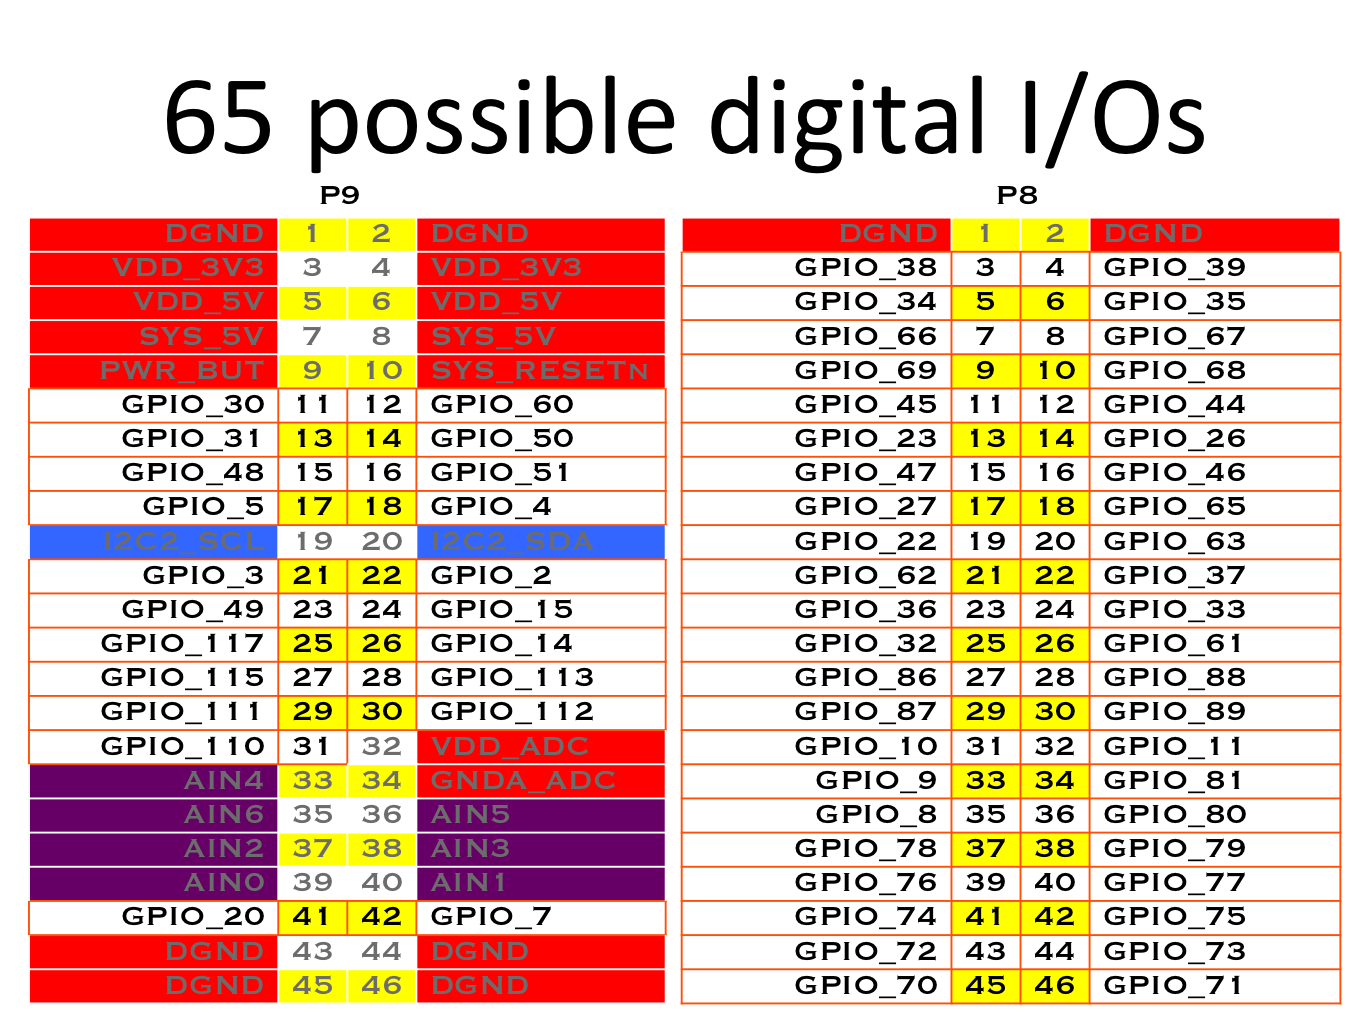
In GPIO mode, each digital I/O can produce interrupts.
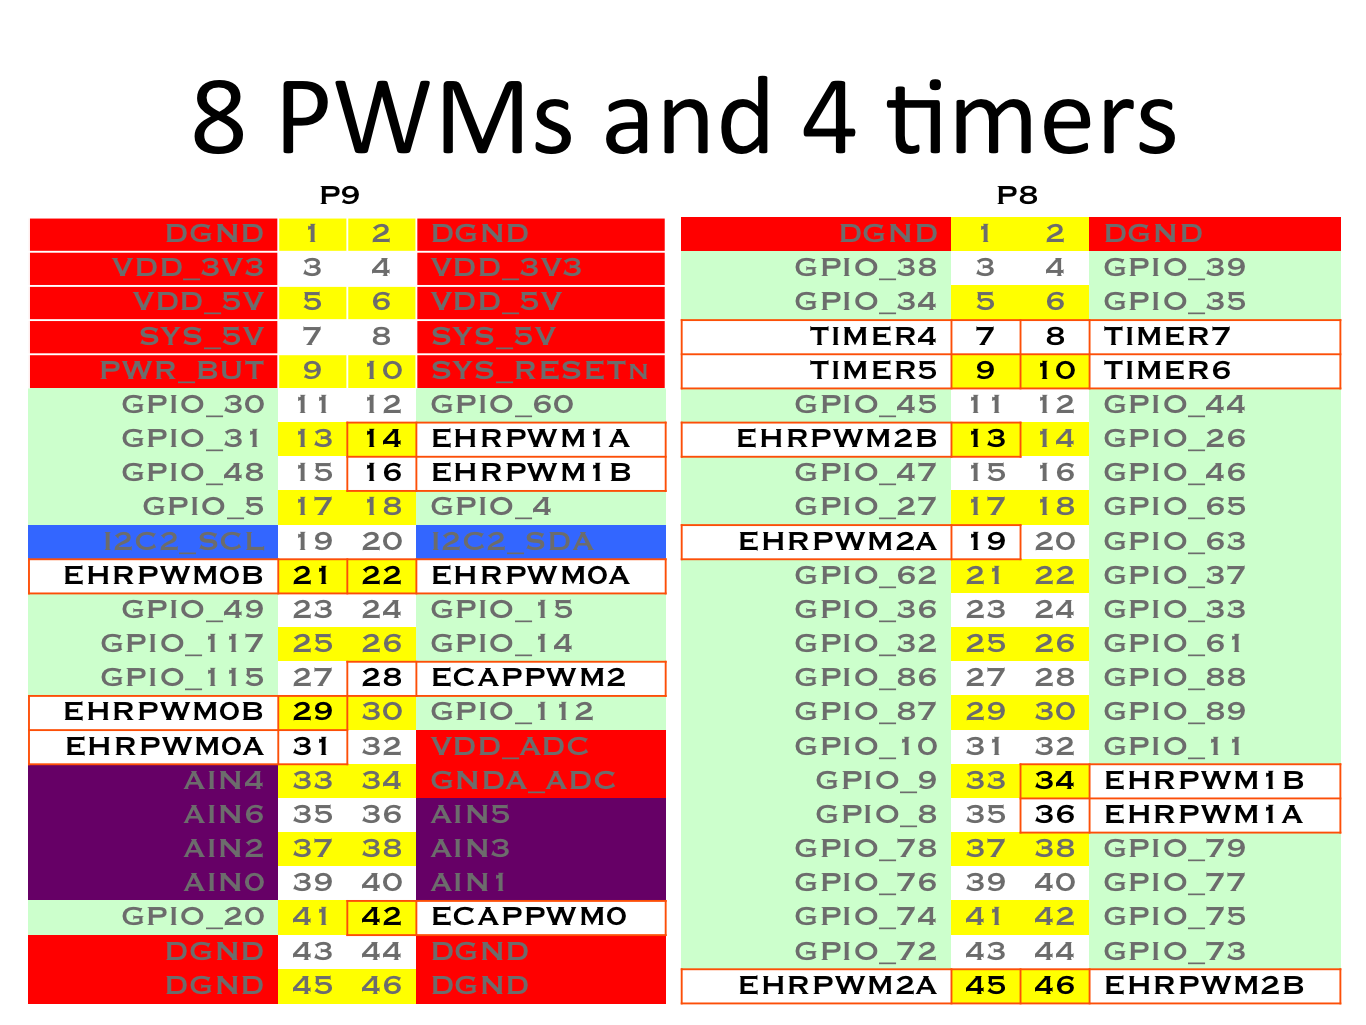
Up to 8 digital I/O pins can be configured with pulse-width modulators (PWM) to produce signals to control motors or create analog voltage levels, without taking up any extra CPU cycles.
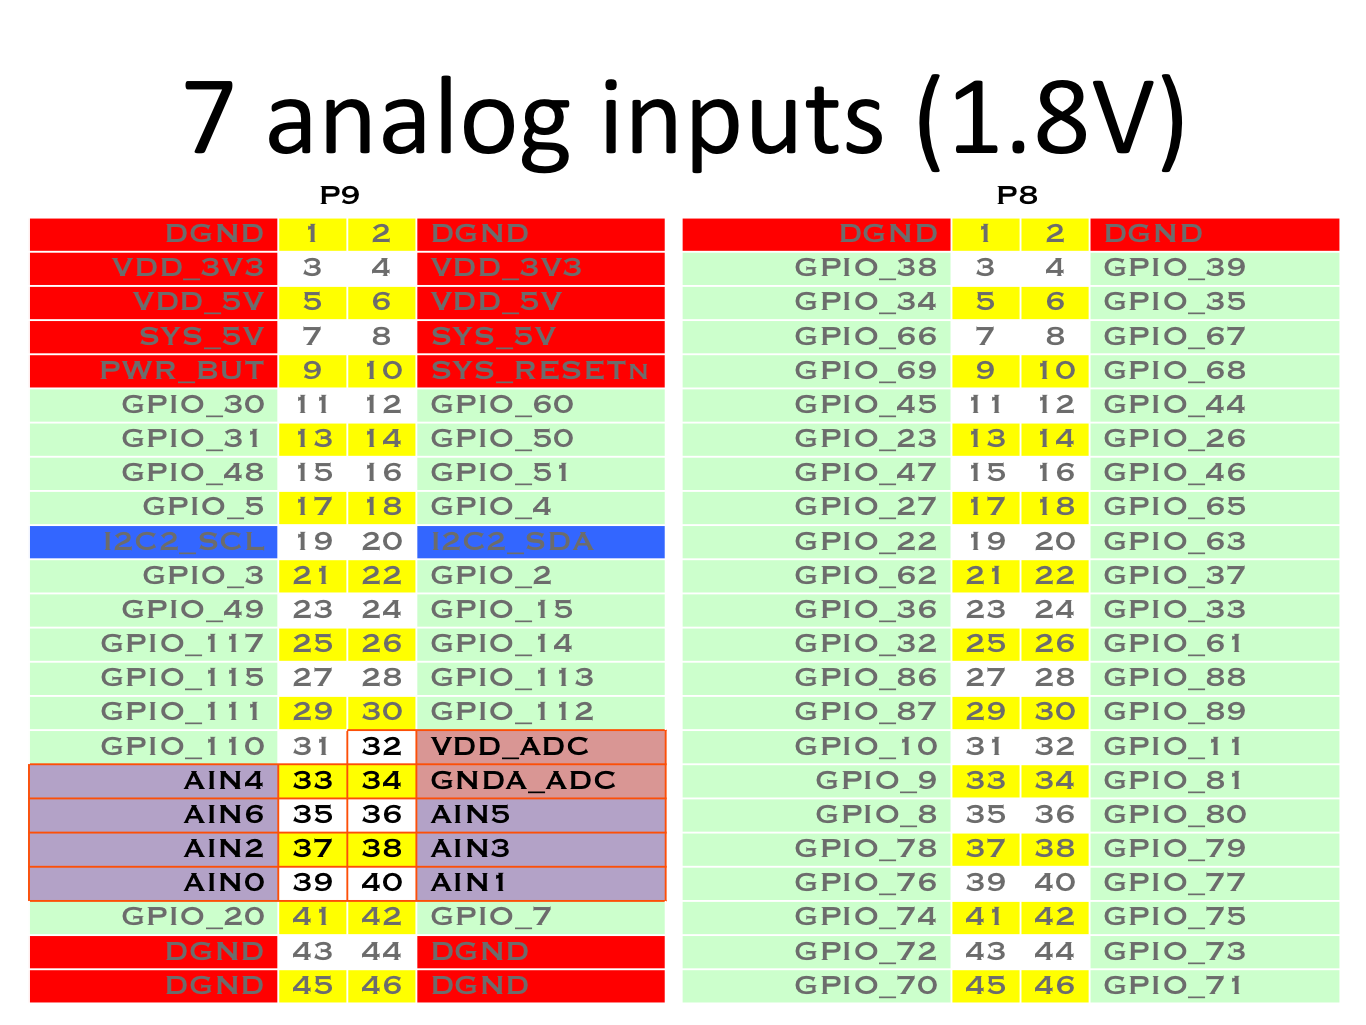
Make sure you don't input more than 1.8V to the analog input pins.
This is a single 12-bit analog-to-digital converter with 8 channels, 7 of which are made available on the headers.
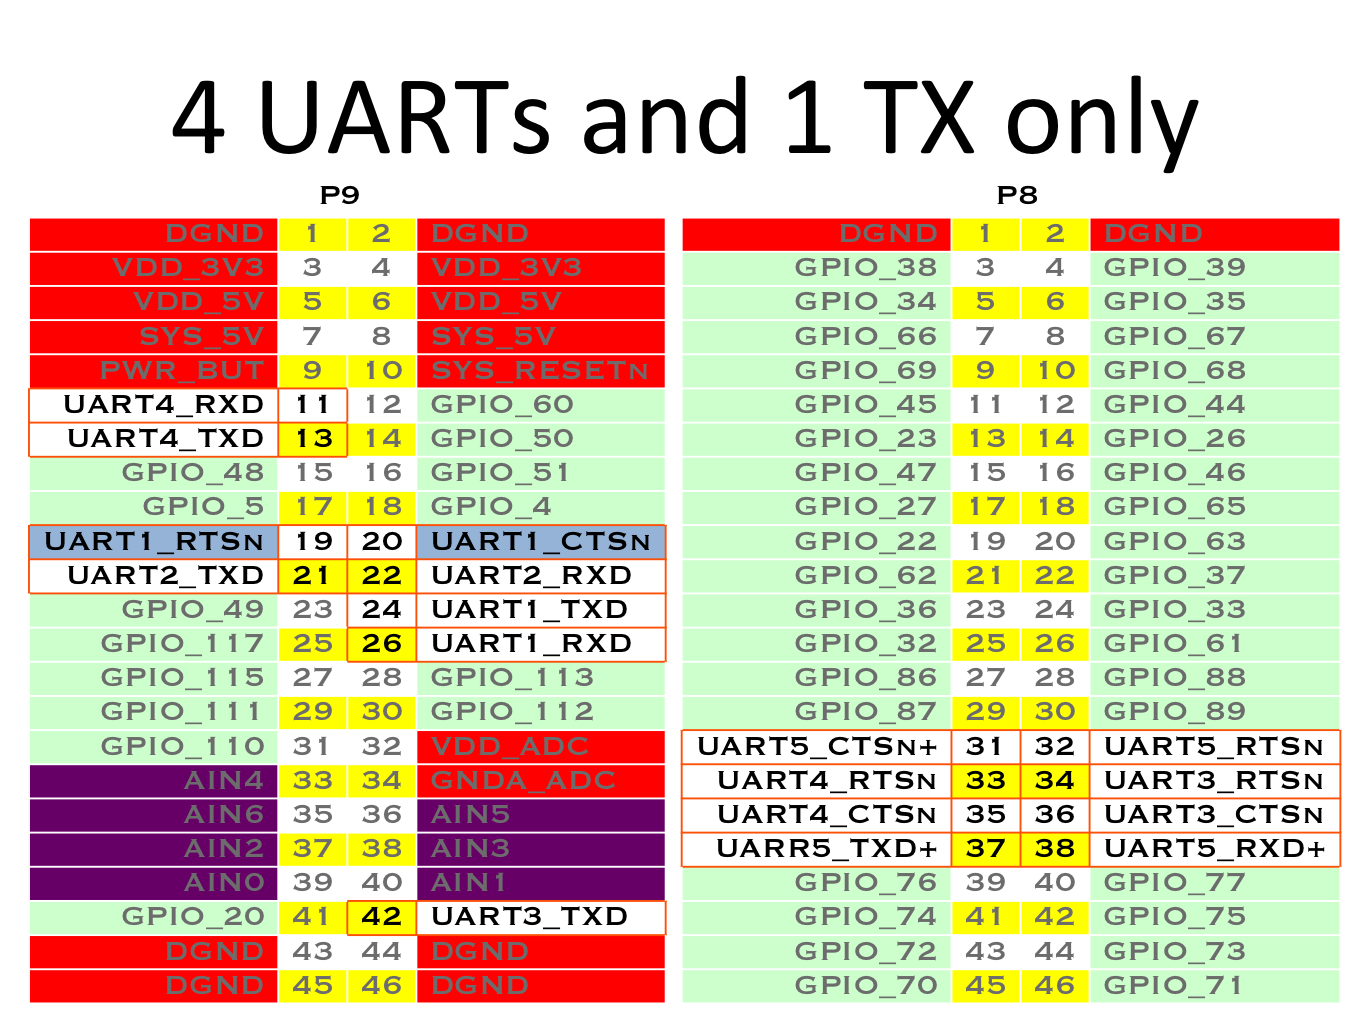
There is a dedicated header for getting to the UART0 pins and connecting a debug cable. Five additional serial ports are brought to the expansion headers, but one of them only has a single direction brought to the headers.
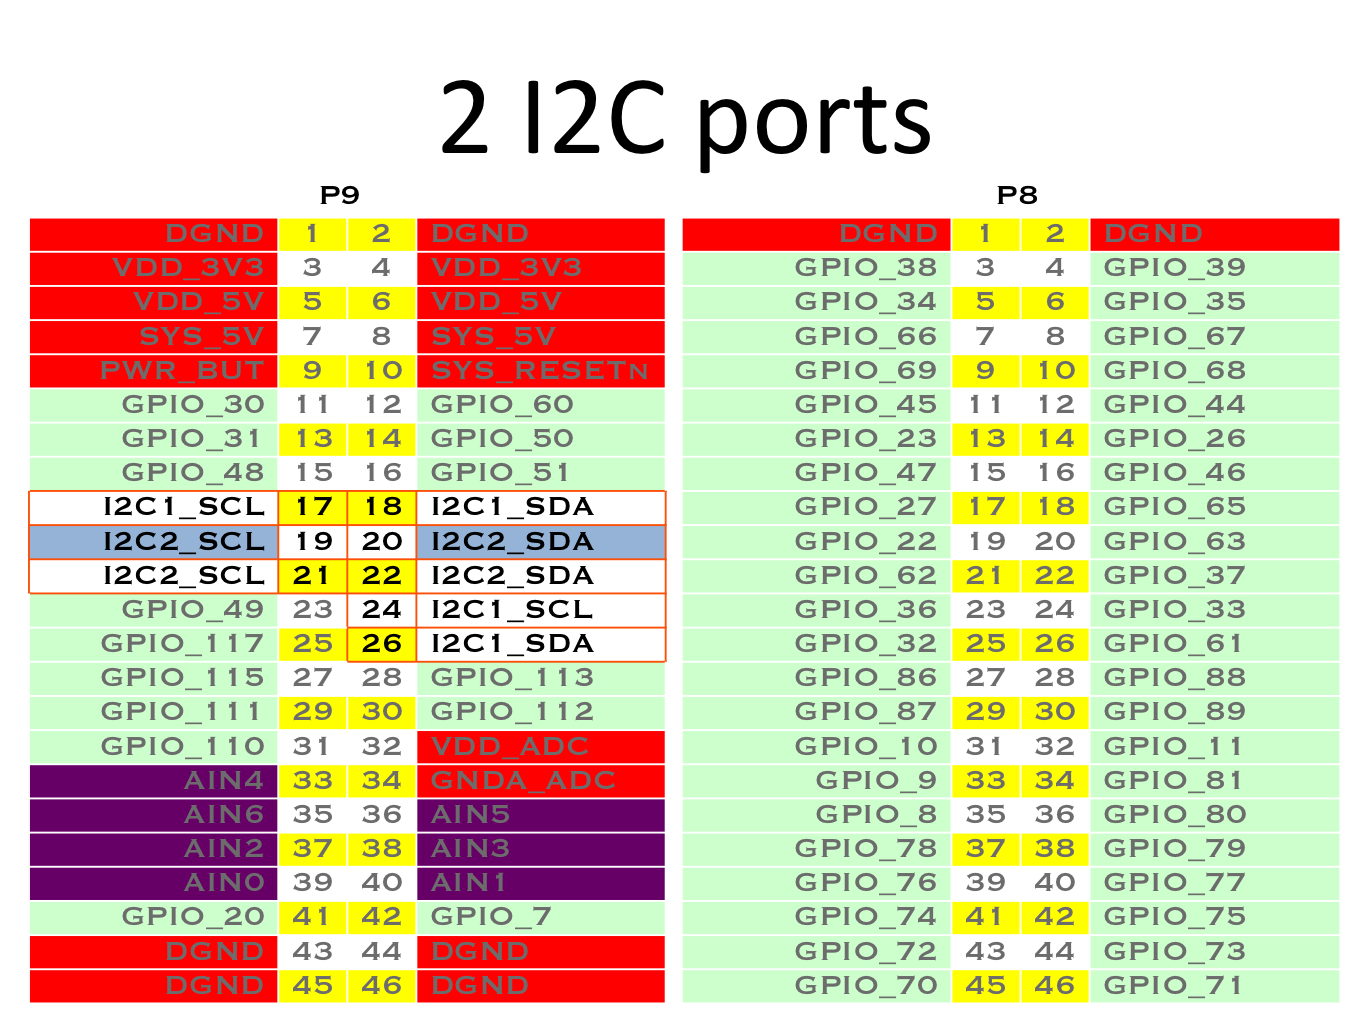
The first I2C bus is utilized for reading EEPROMS on cape add-on boards and can't be used for other digital I/O operations without interfering with that function, but you can still use it to add other I2C devices at available addresses.
The second I2C bus is available for you to configure and use.
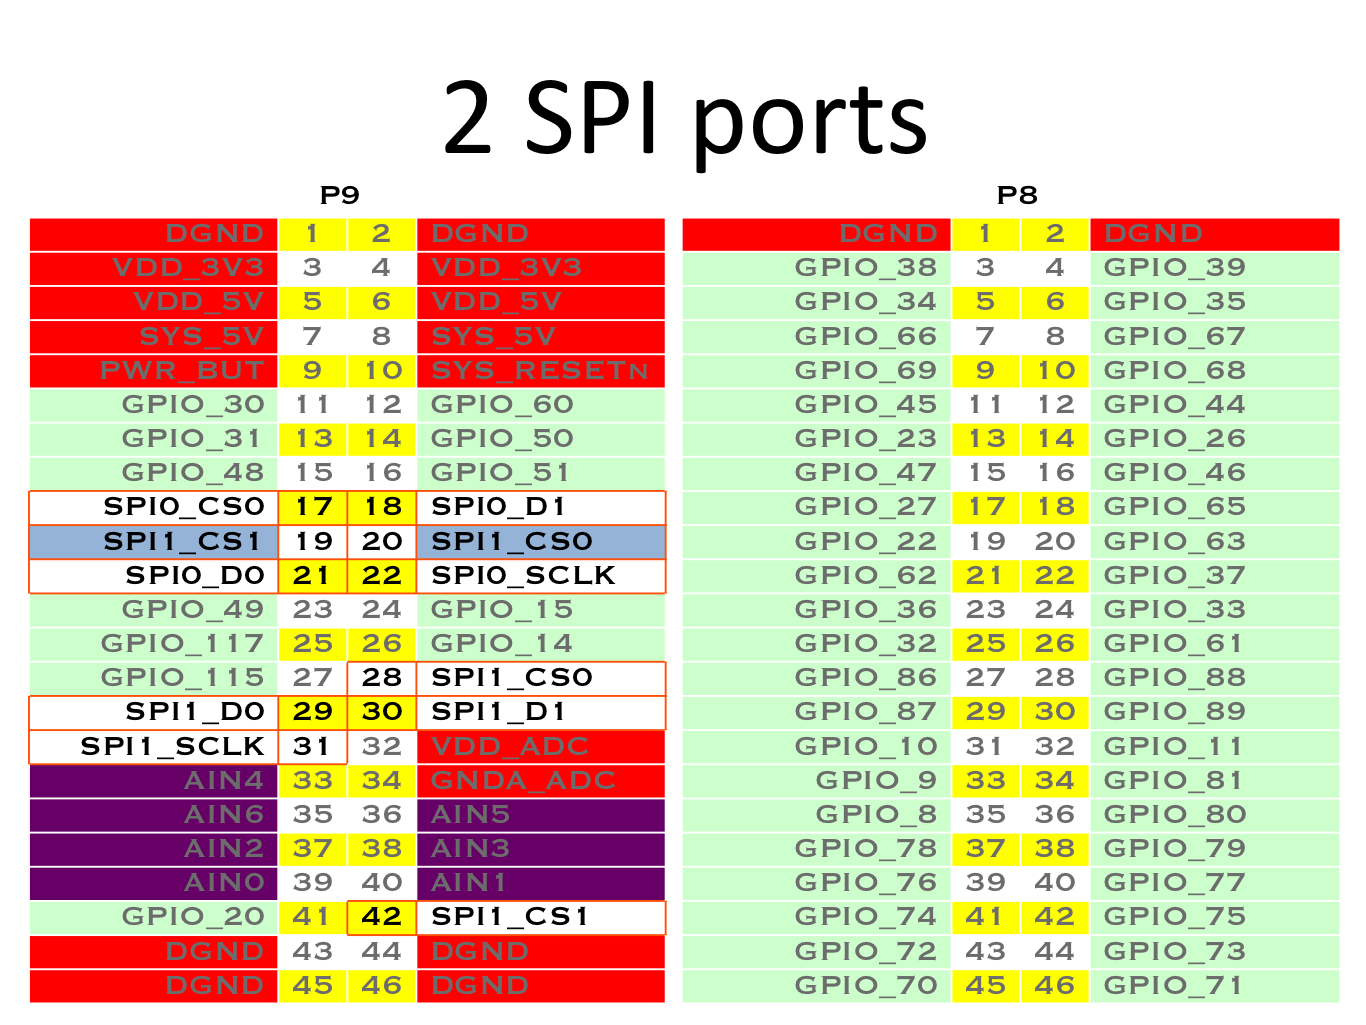
For shifting out data fast, you might consider using one of the SPI ports.
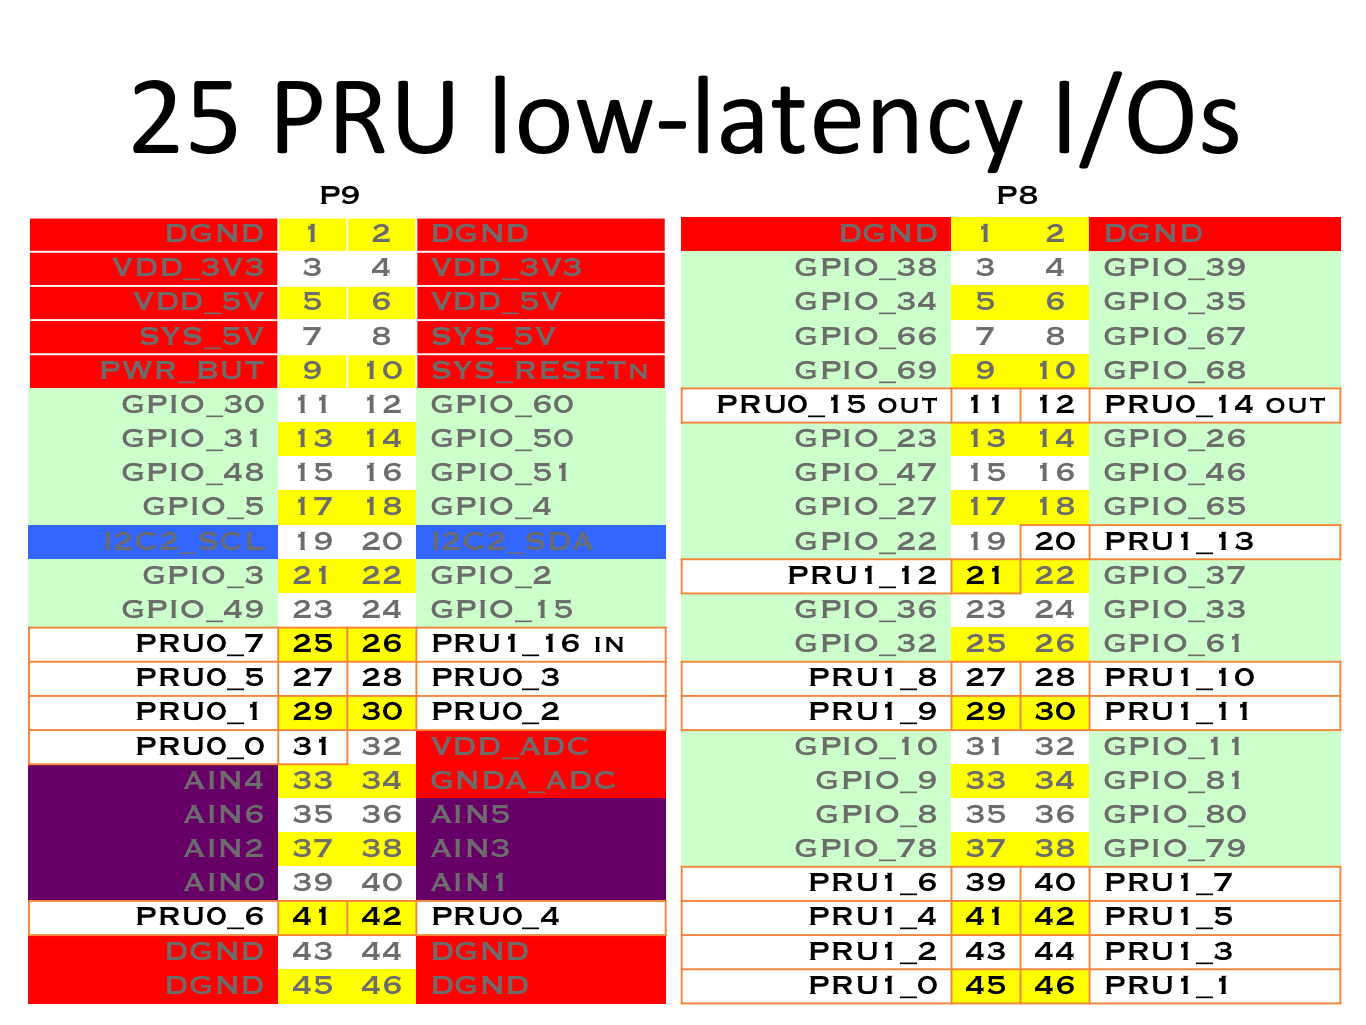
Advanced users can also make use of 2 built-in 32-bit 200-MHz microcontrollers called Programmable Real-time Units (PRUs) for performing real-time tasks. Each PRU has some pins associated with it tied directly to registers for super-low-latency access.

Capes
Capes are really just daughterboards for BeagleBones, but we refer to them enough that a short name makes sense. BeagleBone wears them, they typically have a cut-out around the Ethernet connector that gives them a cape-like shape and Underdog is a Beagle!
The beaglebonecapes.com site attempts to consolidate the currently available cape add-on boards for BeagleBone and BeagleBone Black.
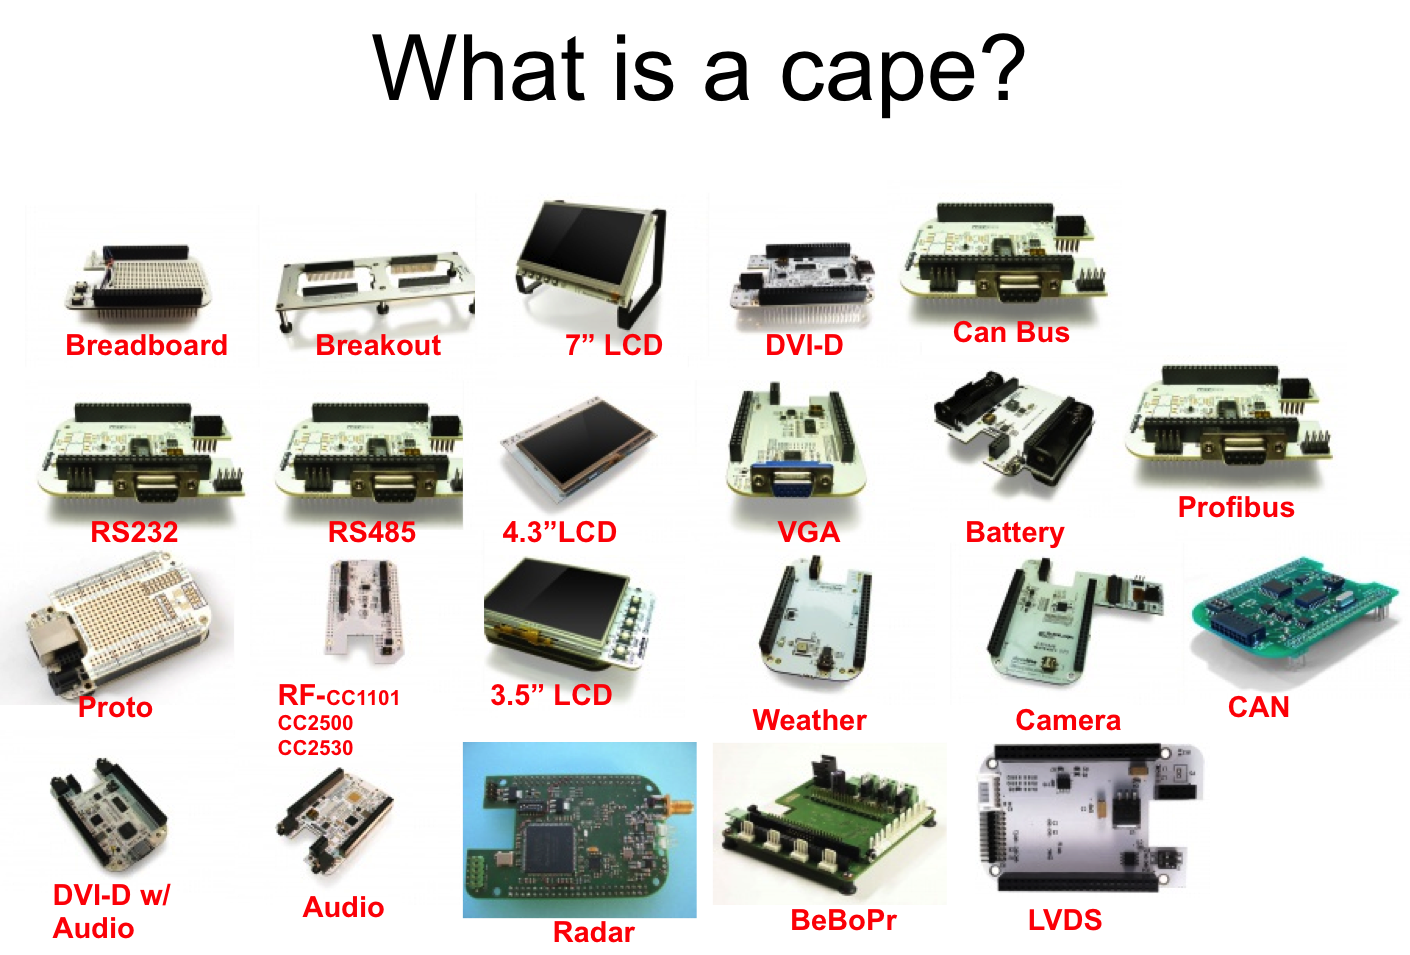
The types of capes available is quite diverse, from 3D printer capes and touchscreen displays to wireless communications and FPGA-based prototyping tools.

Every cape that utilizes pins on the expansion header is expected to notify software on the board by providing contents within EEPROM connected to I2C2 with an address from 0x54 to 0x57. To work with other capes, you can make your address selectable between those values to avoid conflicts. It is also possible to provide through connectors such that other capes can also get connections to the cape header pins
Headers on BeagleBone Black
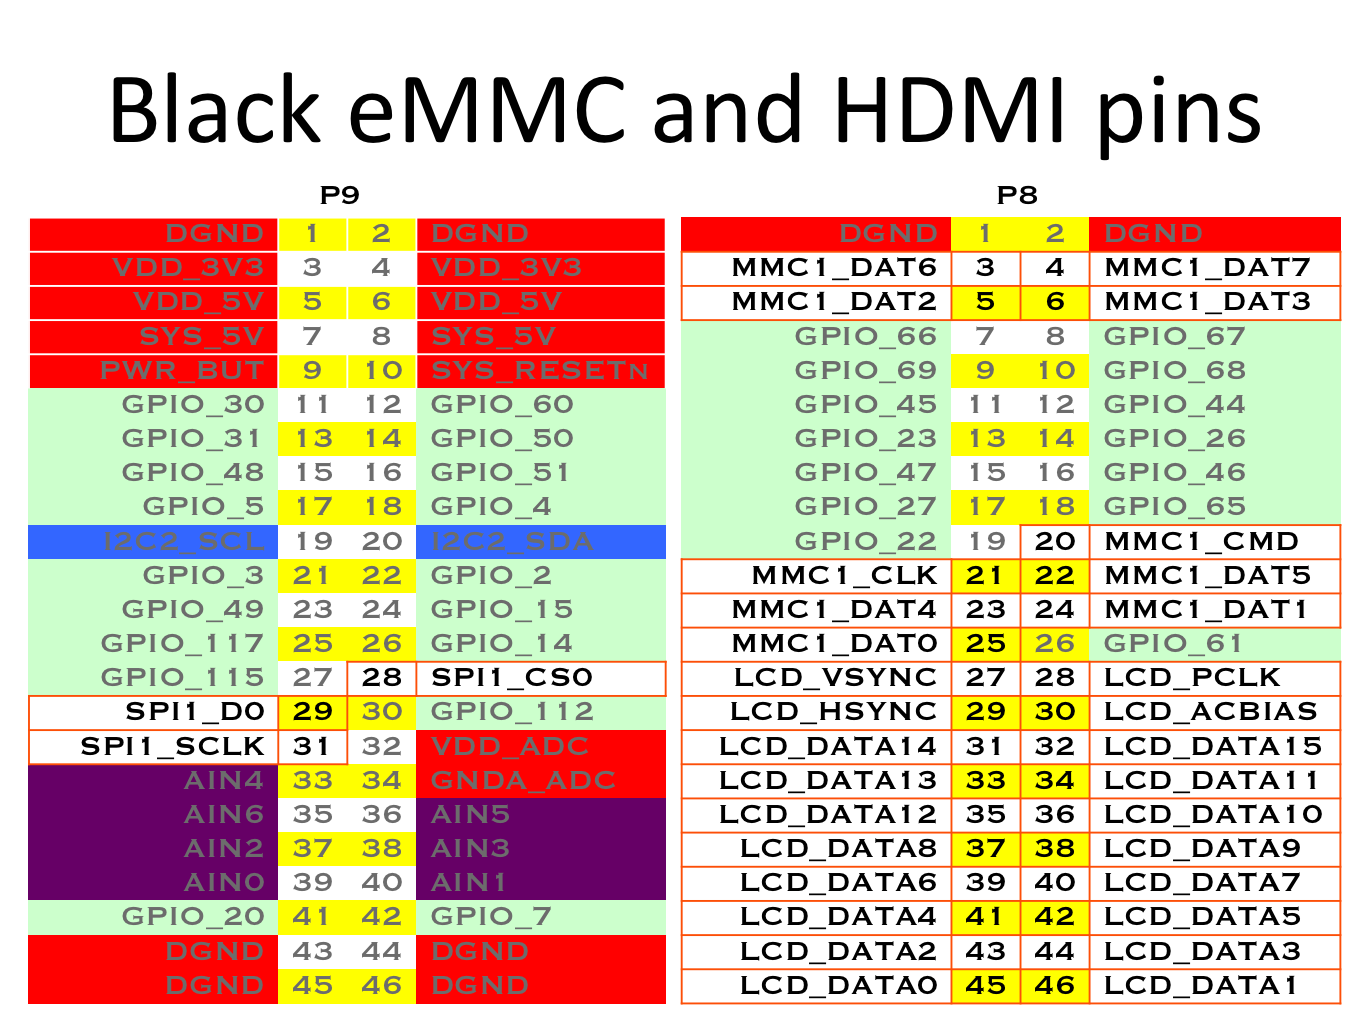
BeagleBone Black ships with two virtual capes already on it, one for the on-board eMMC storage and one for the HDMI output. When configured for use these virtual capes consume actual resources.
If the eMMC is not placed in reset, the MMC1* signals may not be used without potentially corrupting the contents of your on-board eMMC---and possibly damaging the physical circuit as well.
The HDMI signals are all inputs to the HDMI device, so there is no need to put the HDMI device into reset, but using those pins for other operations will cause the HDMI output to be disrupted. However, note that the Linux software typically allocates these for use by the HDMI driver, so your software might not be able to get access to them without unloading that driver.
Cape demos
- Bacon Cape - Teach basic interactions
Books
For a complete list of books on BeagleBone, see http://beagleboard.org/books.
Bad to the Bone
Perfect for high-school seniors or freshman univerisity level text, consider using "Bad to the Bone"
BeagleBone Cookbook
A lighter treatment suitable for a bit broader audience without the backgrounders on programming and electronics, consider "BeagleBone Cookbook"
Exploring BeagleBone and Embedded Linux Primer
To take things to the next level of detail, consider "Exploring BeagleBone" which can be considered the missing software manual and utilize "Embedded Linux Primer" as a companion textbook to provide a strong base on embedded Linux suitable for working with any hardware that will run Linux.
